Window and Door Weather Stripping Maintenance and Lifespan Guide
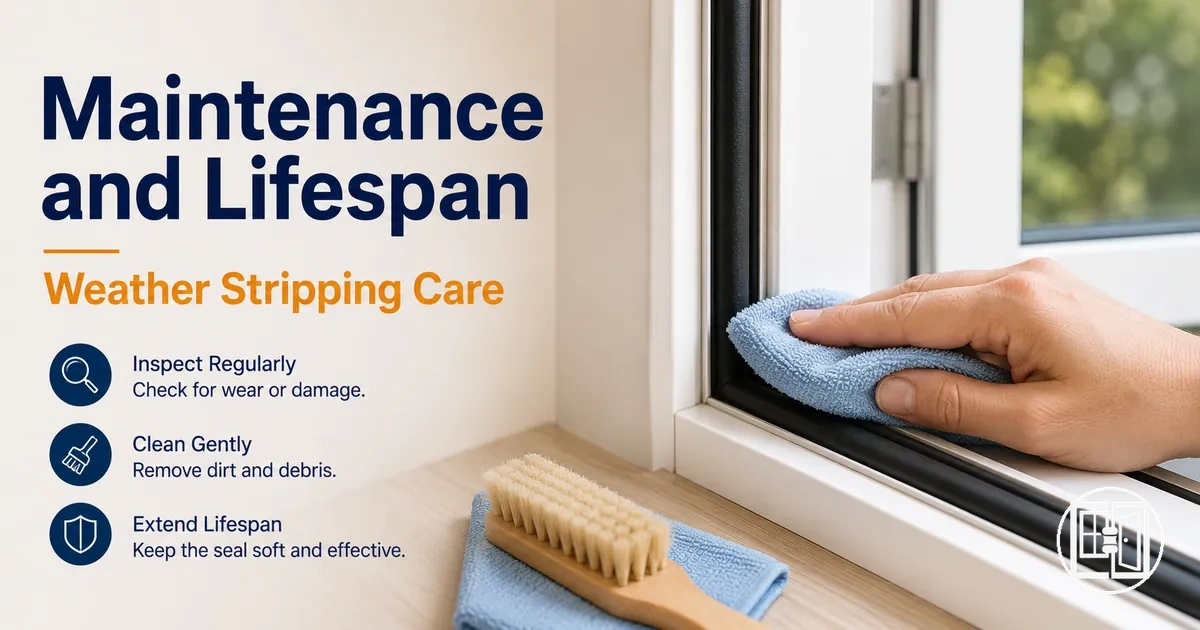
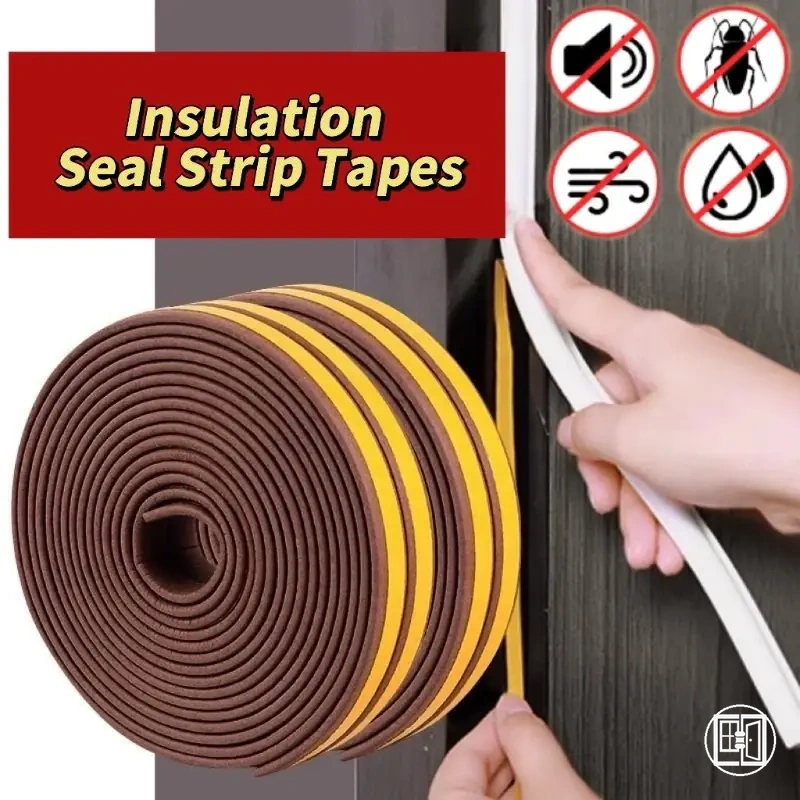
Weather stripping is a maintainable sealing component used around door seals and window seals to support frame contact and reduce drafts. Its maintenance focuses on keeping the seal surface, compression path, and adhesive edge in suitable condition so seal performance stays reliable for as long as the material and fit allow.
Weather stripping lifespan varies by material, exposure, use, fit, and care rather than one fixed replacement date. A seal on a frequently used exterior door may wear differently from a sheltered window seal because compression, moisture, sunlight, surface residue, and frame movement can change durability over time. Maintenance can support longer service, but existing wear and local conditions still affect the result.
Useful maintenance connects inspection, cleaning, protection, seasonal timing, and replacement judgment into one condition-based routine. The main question is whether the weather stripping still makes clean contact, recovers from compression, stays attached, and limits drafts without creating closing resistance. Those checks prepare the article to move from general lifespan expectations into practical condition review.
Weather stripping maintenance is not the same as installing a new seal strip or replacing every worn-looking area immediately. This guide stays within care, condition signals, and replacement timing criteria, so later sections can explain when cleaning, conditioning, adhesive attention, or replacement may be the more suitable next step.
How weather stripping condition affects seal performance over time
Weather stripping condition affects seal performance over time by influencing how consistently door and window seals maintain frame contact against everyday movement and exposure. As the condition of the seal changes, its ability to reduce drafts, moisture, noise, and air leakage may also change, making sealing consistency depend on the condition of the weather stripping rather than its age alone.
How weather stripping condition affects seal performance over time is easier to interpret when the main condition points are viewed together. The diagram below labels the contact areas and condition signals that influence drafts, moisture control, and consistent frame contact.
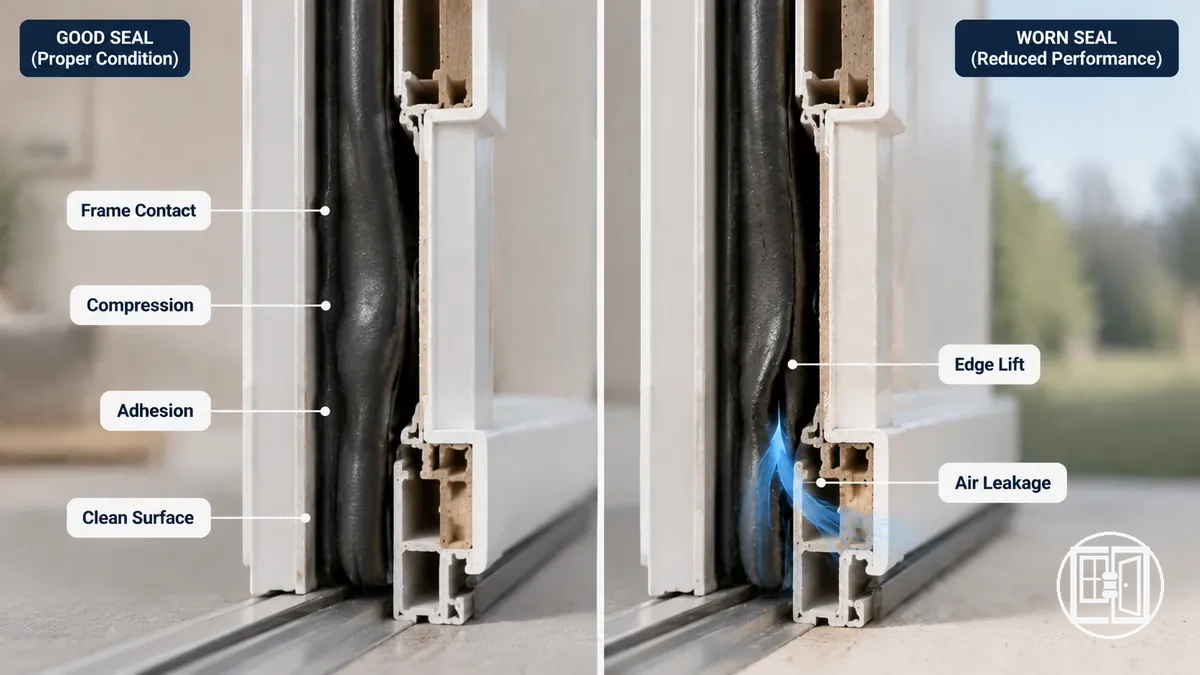
Weather stripping condition can be assessed by looking at seal contact, compression recovery, adhesion, surface cleanliness, and frame movement. Compression that no longer recovers fully, adhesive edges that begin to lift, or residue that interrupts contact may reduce seal performance. As these condition changes become more noticeable, the likelihood of drafts, moisture intrusion, or air leakage can increase.
Seal performance often changes gradually instead of failing all at once. Maintenance can help support sealing performance by addressing condition changes early, but it cannot correct poor fit, the wrong seal type, or a major installation failure.
The following checklist organizes the main condition factors that affect seal performance over time:
- Consistent frame contact along the sealing path.
- Compression recovery after the door or window is opened and closed.
- Adhesion without noticeable edge lift.
- Surface cleanliness with minimal residue on the sealing surface.
- Frame movement that does not interrupt normal seal contact.
Weather stripping lifespan expectations for doors and windows
Weather stripping lifespan depends on material, exposure, usage, fit, and maintenance rather than one fixed time range. Door seals and window seals can age at different rates even when they use similar materials because their operating conditions differ. For that reason, weather stripping should be evaluated by its condition instead of expecting a single fixed lifespan.
Material ageing is only one factor that influences service life. Frequent door usage can increase compression wear, while sunlight, moisture, and changing weather conditions may affect durability over time. Proper fit helps maintain consistent seal contact, and adhesive condition can influence whether the weather stripping remains securely positioned. Together, these condition attributes shape sealing consistency and replacement timing.
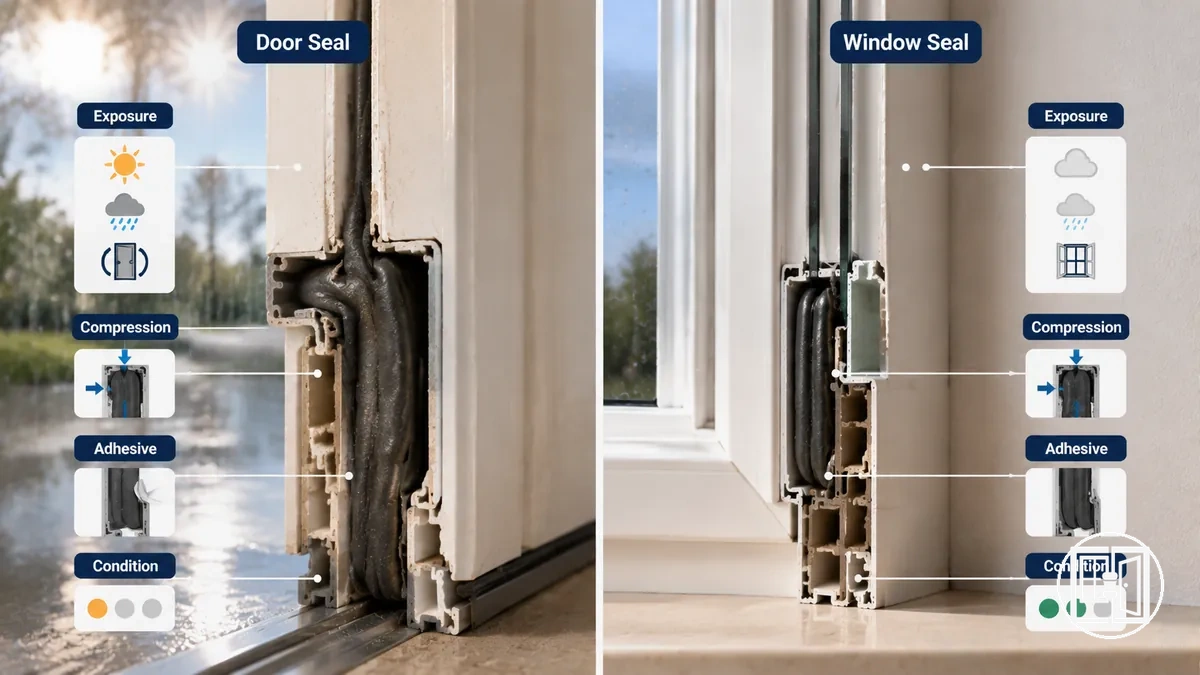
Weather stripping lifespan expectations for doors and windows are easier to understand when the main condition drivers are viewed together. The comparison graphic below organizes these lifespan factors by condition rather than suggesting fixed expiry dates.
| Driver | What to check | Condition signal | Effect on lifespan |
|---|---|---|---|
| Material | Surface flexibility and overall condition | Hardening, cracking, or distortion | May reduce compression and seal life |
| Use frequency | Door or window operation | Repeated compression wear | May shorten service life |
| Exposure | Sunlight, moisture, and weather | Drying, fading, or moisture effects | Can accelerate ageing |
| Fit | Seal alignment with the frame | Uneven contact or visible gaps | May reduce sealing consistency |
| Maintenance | Overall seal condition | Clean, flexible sealing surface | Can help support service life when other conditions remain suitable |
| Adhesive condition | Attachment along the seal edge | Edge lift or loosening | May indicate earlier replacement timing |
Treat these values as condition-based signals rather than exact lifespan predictions. For example, a frequently used exterior door seal may show compression wear sooner than a sheltered window seal, even when both use similar materials, because differences in exposure and usage can influence ageing.
Material type, compression, and adhesive ageing
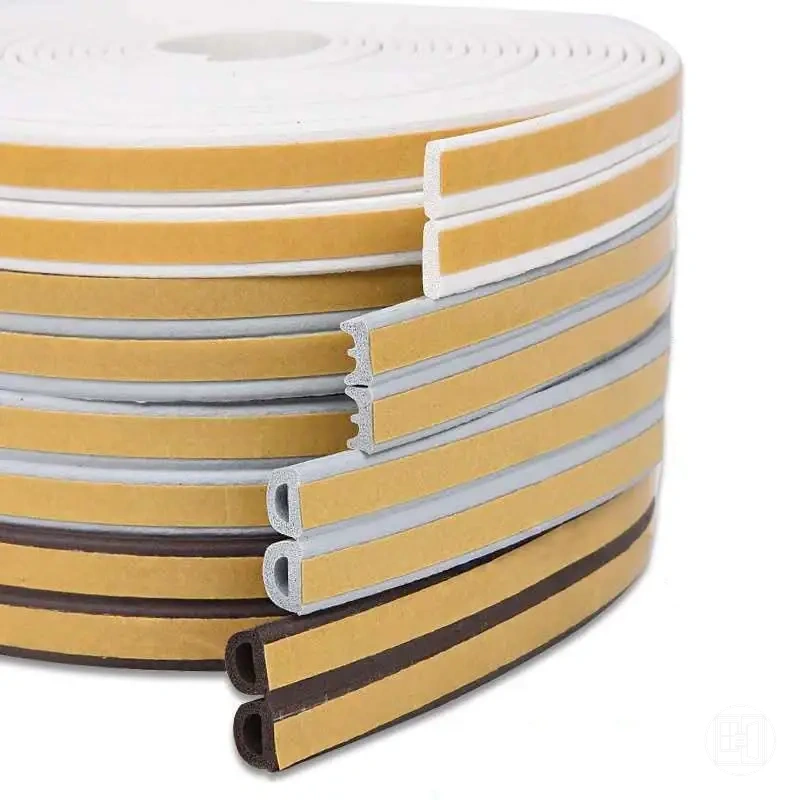
Material type, compression set, and adhesive ageing influence how weather stripping changes over time and how wear becomes visible during inspection. Different seal materials may respond differently to repeated compression, environmental exposure, and surface attachment. These material behaviours create wear signals that can help indicate changes in resilience, grip, gap closure, and replacement urgency.
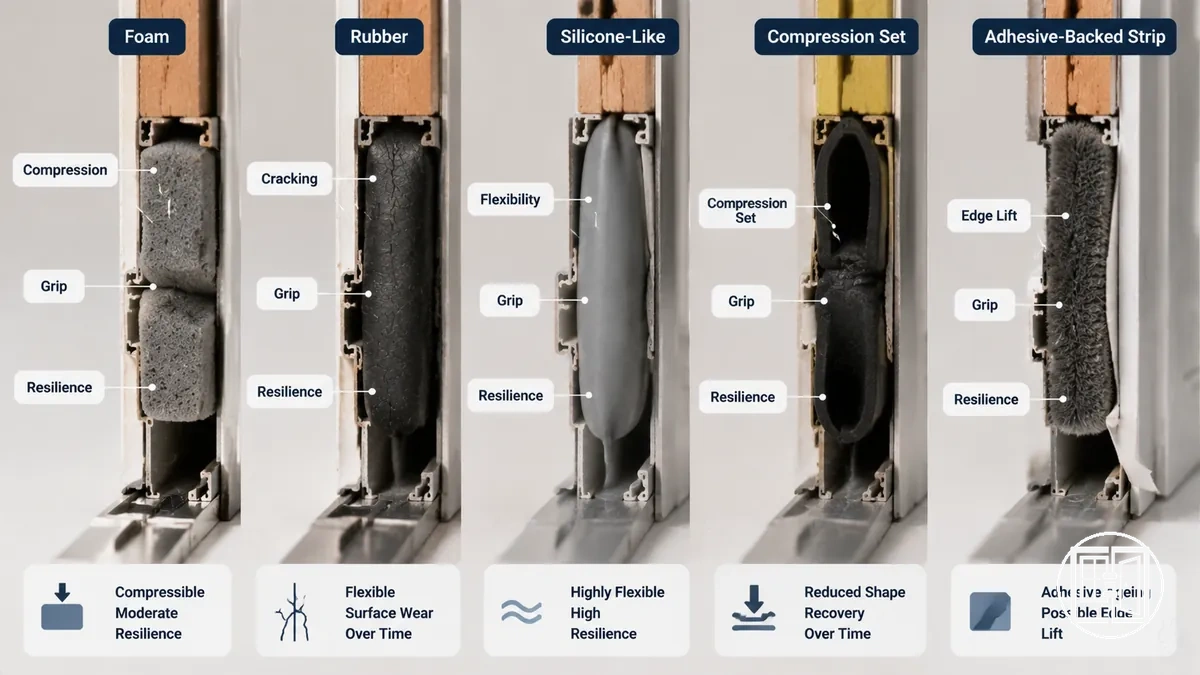
Material type, compression, and adhesive ageing are easier to understand when the main wear signals are viewed together. The annotated example below highlights the condition changes that affect resilience, grip, and gap closure.
The following examples compare common material and attachment behaviours:
- Foam: Compression set may appear as flattening, which can reduce resilience and make gap closure less consistent.
- Rubber: Reduced flexibility or visible cracking may indicate ageing that affects resilience over time.
- Silicone-like material: Surface wear or gradual loss of flexibility can change material behaviour, depending on exposure and usage.
- Compression-style seal: Limited shape recovery after pressure is a visible sign of compression loss that may reduce sealing contact.
- Adhesive-backed strip: Edge lift, reduced grip, or surface residue can indicate adhesive ageing and may increase replacement urgency.
Compression loss and adhesive failure describe different wear signals. Compression loss affects how the seal recovers after pressure, while adhesive failure affects how securely the seal remains attached to the frame.
Use frequency, sunlight, moisture, and temperature exposure
Use frequency, sunlight, moisture, and temperature exposure can influence how weather stripping wears over time. A frequently used exterior door and a sheltered window may place the same seal material under different operating conditions. These everyday conditions make exposure an important lifespan variable.
Use frequency, sunlight, moisture, and temperature exposure are easier to understand when viewed together. The diagram below organizes the exposure conditions that can influence drying, cracking, flattening, and adhesive stress.
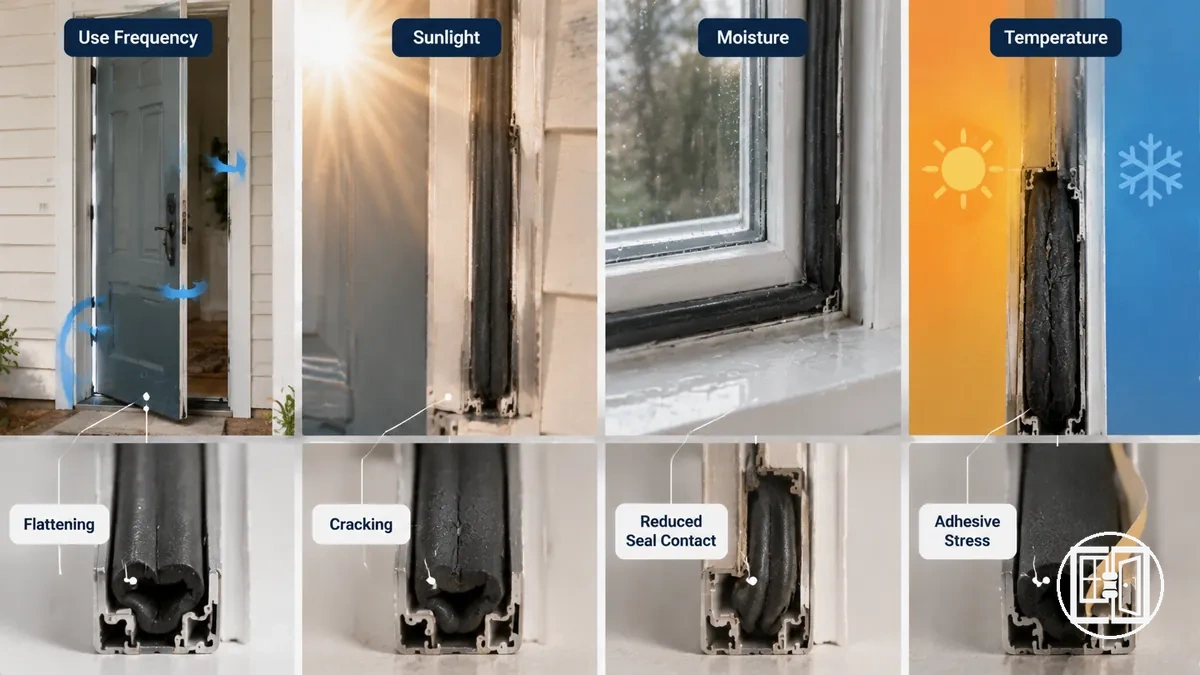
- Use frequency: High door movement increases repeated pressure, which may contribute to flattening and gradual compression wear.
- Sunlight: Extended UV exposure can promote drying or cracking, depending on the seal material and local conditions.
- Moisture: Damp conditions or persistent surface residue may increase adhesive stress and contribute to edge lift over time.
- Temperature exposure: Repeated heat or cold exposure can influence flexibility and may affect consistent seal contact.
- Sheltered seal: A protected window or door location may experience lower exposure, although wear still depends on use frequency, maintenance, and local conditions.
For example, a high-use, sun-exposed exterior door seal may show wear sooner than a sheltered seal around a lightly used window. The outcome depends on the combined effect of operating conditions rather than a fixed or exact lifespan.
Inspecting weather stripping before drafts and seal failure
Inspect weather stripping regularly to identify early wear before drafts, gaps, moisture, or closing problems become more noticeable. A careful inspection focuses on the frame, seal contact, and visible condition rather than waiting for a failed seal. Early inspection supports timely maintenance decisions before wear becomes more difficult to manage.
Inspect the full frame path where the weather stripping contacts the door or window and look for consistent seal contact from end to end. Check whether compression recovers after the door or window is opened, whether the adhesive edge remains attached, and whether gaps appear when the frame is closed. Observe visible wear, loose edges, moisture clues, or uneven closing pressure that may indicate changing seal performance. Minor residue or slight misalignment may only require cleaning or careful reseating, while more persistent wear can justify adhesive attention or further assessment.
Inspecting weather stripping before drafts and seal failure should verify these key maintenance points:
- Check the full frame for continuous seal contact without visible gaps.
- Look for compression that recovers after the seal is released.
- Inspect the adhesive edge for lifting, loosening, or separation.
- Check for visible wear, cracking, flattening, or surface damage.
- Look for moisture clues or residue that may affect seal contact.
- Close the door or window to verify even contact along the sealing path.
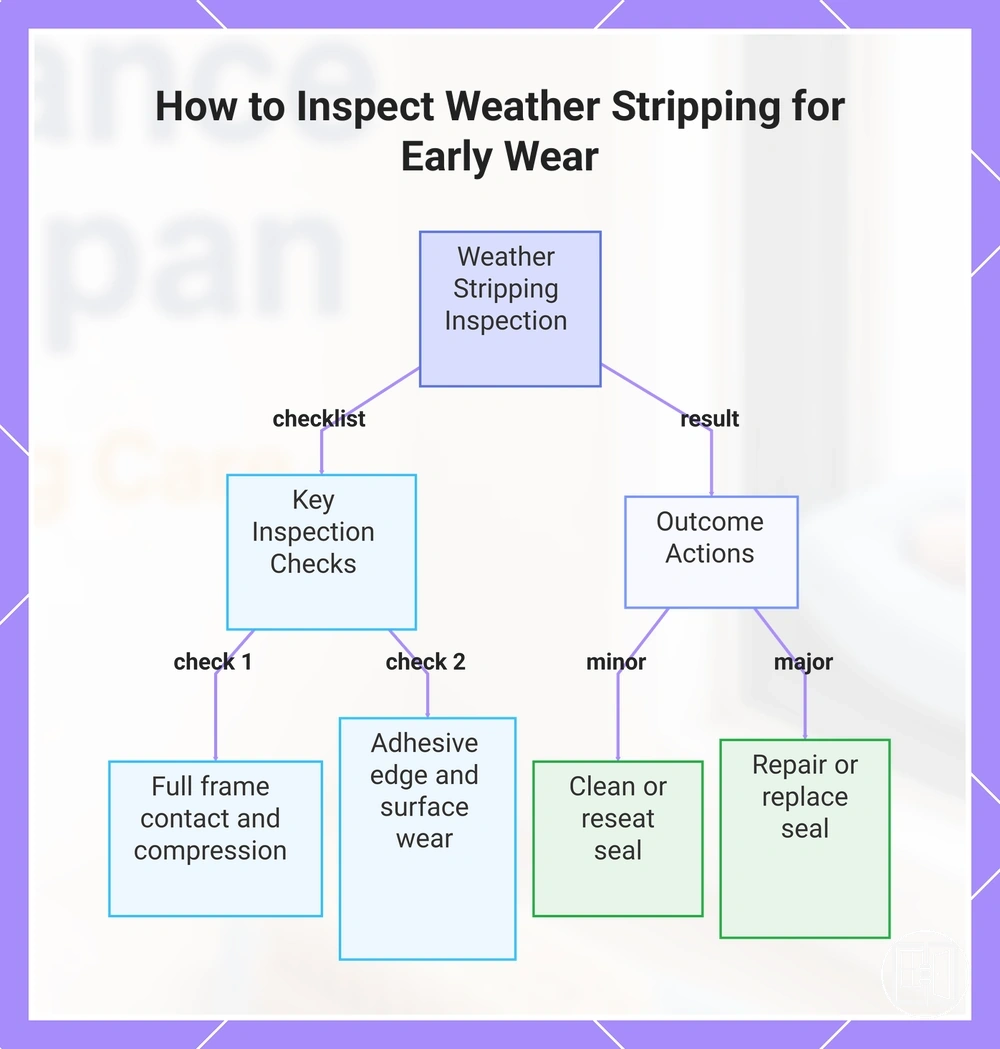
If inspection identifies only light residue or a slightly displaced seal, cleaning or careful reseating may be appropriate. When the adhesive edge continues to lift, compression no longer recovers, or gaps remain after inspection, the condition may require adhesive attention, repair, or later replacement judgment to help prevent seal failure.
This chart shows the key inspection checks and resulting maintenance actions for weather stripping to prevent drafts and seal failure.
Cracks, flattening, loose edges, and visible gaps
Cracks, flattening, loose edges, and visible gaps are visible inspection signals that can indicate weather stripping wear or attachment weakness. Not every surface mark affects seal function, but defects that change compression, adhesion, or frame contact may lead to contact loss and deserve closer inspection.
Use the visible condition of the weather stripping to distinguish cosmetic surface marks from defects that may affect sealing performance. The following symptom groups explain what each condition may indicate and what to inspect next.
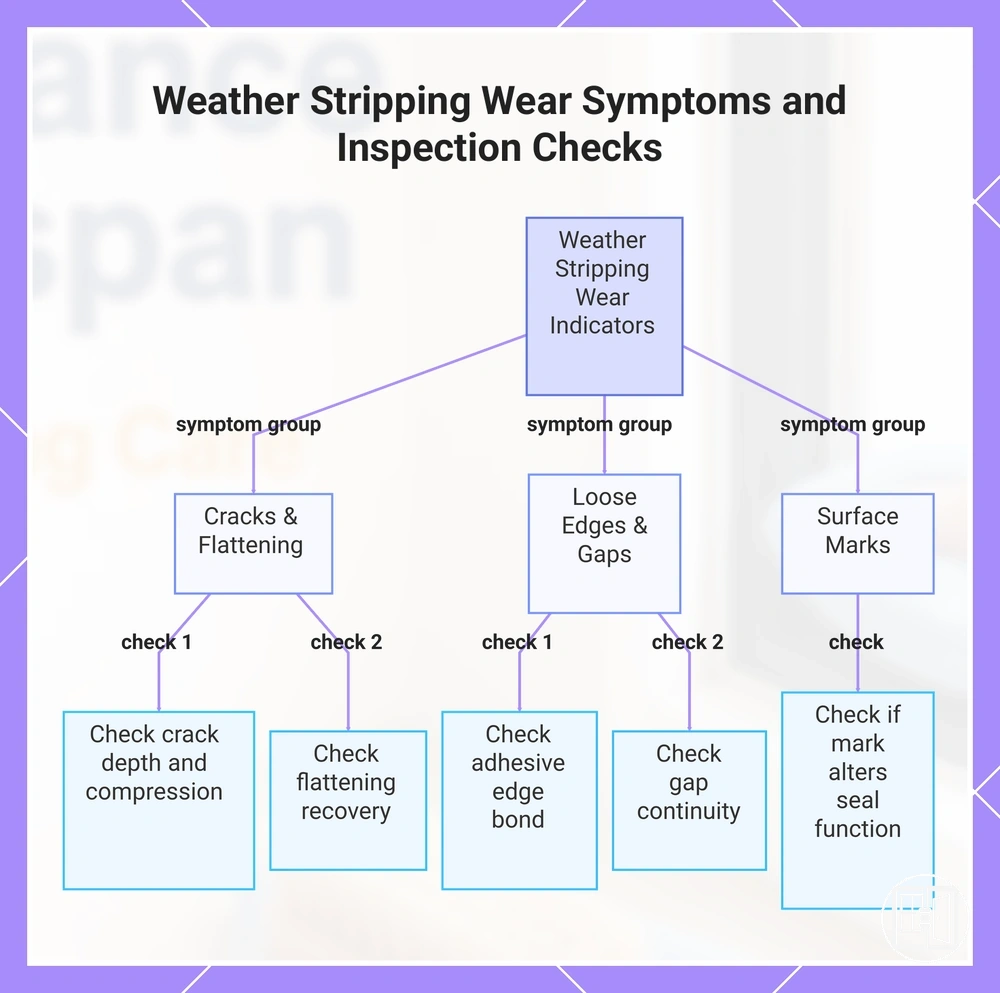
- Cracks: Small splits or brittle areas may reduce seal contact as the material ages. Inspect whether the crack extends through the sealing surface and affects compression.
- Flattening: Compressed areas may indicate reduced compression recovery and less consistent gap closure. Check whether the seal regains its shape after pressure is released.
- Loose edges: Lifted edges often suggest weakening adhesion or surface residue. Inspect the adhesive edge to confirm that the seal remains securely attached along the frame.
- Visible gaps: Open gaps between the seal and the frame may reduce consistent contact and allow drafts. Check whether the gap is limited to one location or continues along the sealing path.
- Surface marks: Light scuffs or cosmetic marks do not necessarily affect seal function. Inspect whether the visible change alters contact, compression, or adhesion before deciding on further maintenance.
This chart groups weather stripping wear signs into three symptom categories and shows the key inspection check for each condition.
Drafts, closing resistance, noise changes, and moisture clues
Drafts, closing resistance, noise changes, and moisture clues can indicate a change in weather stripping seal condition, but they do not confirm the cause on their own. These functional clues are most useful when they are verified alongside seal contact, compression, and the frame area. Verification helps distinguish a possible weather stripping issue from other conditions.
Use the following diagnostic checklist to connect each clue with a likely seal-related condition and the next verification step:
- Drafts: Air movement may indicate reduced seal contact or a local gap. Verify whether the weather stripping makes continuous contact along the frame.
- Closing resistance: Hard closing may suggest over-compression, displaced weather stripping, or uneven wear. Check whether compression is consistent and whether the seal sits correctly in the frame.
- Noise changes: New sound changes may point to uneven seal contact. Verify whether the weather stripping remains evenly compressed when the door or window is closed.
- Moisture clues: Damp marks near the frame or adhesive edge may indicate reduced sealing in that area. Inspect the surrounding seal condition and attachment before deciding on maintenance.
- Combined clues: Multiple symptoms occurring together may indicate a broader seal condition change. Verify contact, compression, and adhesion before considering repair or replacement.
If drafts, closing resistance, noise changes, or moisture clues persist after weather stripping maintenance, frame alignment, hardware, or installation faults may also require separate evaluation because these conditions can produce similar symptoms.
Cleaning window and door seal strips without damage
Cleaning window seal strips and door seal strips should remove dirt, dust, and residue while preserving the seal material, adhesive edge, and frame contact surface. Gentle cleaning helps maintain adhesion, flexibility, and consistent contact without placing unnecessary stress on the seal. Use a mild cleaner and finish with a dry cloth to leave the surface clean and dry.
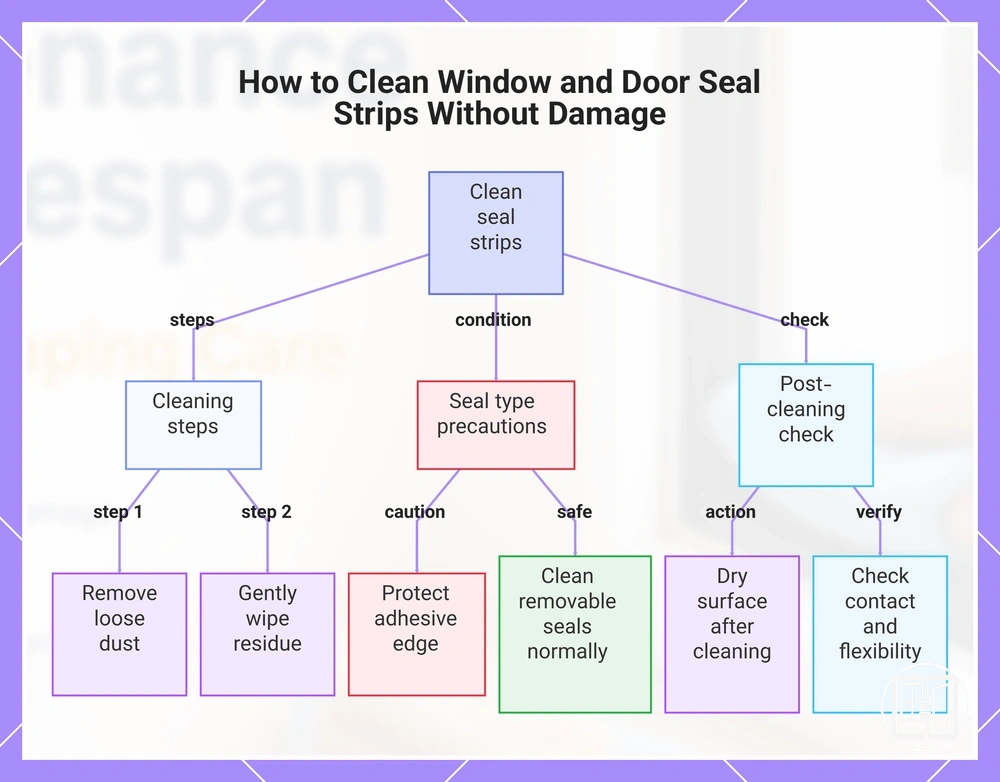
Safe cleaning focuses on removing surface residue rather than scrubbing the seal aggressively. Use light pressure and avoid leaving excess moisture around the adhesive edge or frame contact surface. For adhesive-backed strips, clean carefully without lifting the bonded edge, while removable or compression-style seals can usually be cleaned without disturbing their normal position.
Cleaning window and door seal strips without damage is easiest when the cleaning sequence removes dirt while protecting the seal material.
- Remove loose dirt and dust from the seal strip and surrounding frame with a soft, dry cloth.
- Apply a mild cleaner to the cloth instead of directly onto the seal, then gently wipe away residue.
- Clean the frame contact surface with light pressure, paying attention to areas where dirt or residue collects.
- Wipe away any remaining cleaner and finish with a dry cloth so excess moisture does not remain around the adhesive edge.
- Check that the cleaned seal maintains consistent contact and flexibility, and repeat gentle cleaning if surface residue remains.
Routine cleaning supports ongoing seal care after fitting. For guidance that continues beyond surface cleaning, see installation care to help protect seals after they have been installed.
This chart shows the key steps and precautions for cleaning seal strips while protecting the seal material and adhesive edge.
Mild cleaning methods for dirt, dust, and residue
Mild cleaning removes dirt, dust, and residue while supporting seal preservation. Use a soft cloth with gentle pressure and keep the moisture level low so cleaning remains limited to common surface buildup.
Follow this sequence to remove common buildup without placing unnecessary stress on the seal or adhesive edge.
- Wipe away loose dirt and dust with a soft cloth using gentle pressure, then stop when the surface is clear.
- Apply a mild cleaner to the soft cloth instead of directly onto the seal, keep the moisture level light, and stop when residue has been removed.
- Wipe away remaining residue with gentle pressure, paying attention to the adhesive edge, and stop if the surface appears clean without visible buildup.
- Dry the seal with a clean, dry cloth, keeping the moisture level low, and stop when the surface is fully dry to support seal preservation.
- If sticky residue remains, test mild cleaning on a small area before continuing, and stop if the surface shows any unexpected change.
Drying and surface preparation before further care
Drying and surface preparation prevent trapped moisture or residue from reducing adhesive stability and seal contact after cleaning. Allow the cleaned surface to become dry enough for the material condition and adhesive type before continuing with further care.
Use these checks to confirm that the seal and frame surface are ready before conditioning or other follow-up care.
- Inspect the cleaned surface for remaining residue, and continue only when visible buildup has been removed.
- Check that moisture is no longer present on the seal or frame surface, and continue only when the surface is dry enough for the material condition and adhesive type.
- Confirm that the adhesive edge remains secure and that seal contact is consistent, then continue only when no trapped moisture is visible.
- Review the overall material condition before further care, and wait if the surface still feels damp or requires additional gentle cleaning.
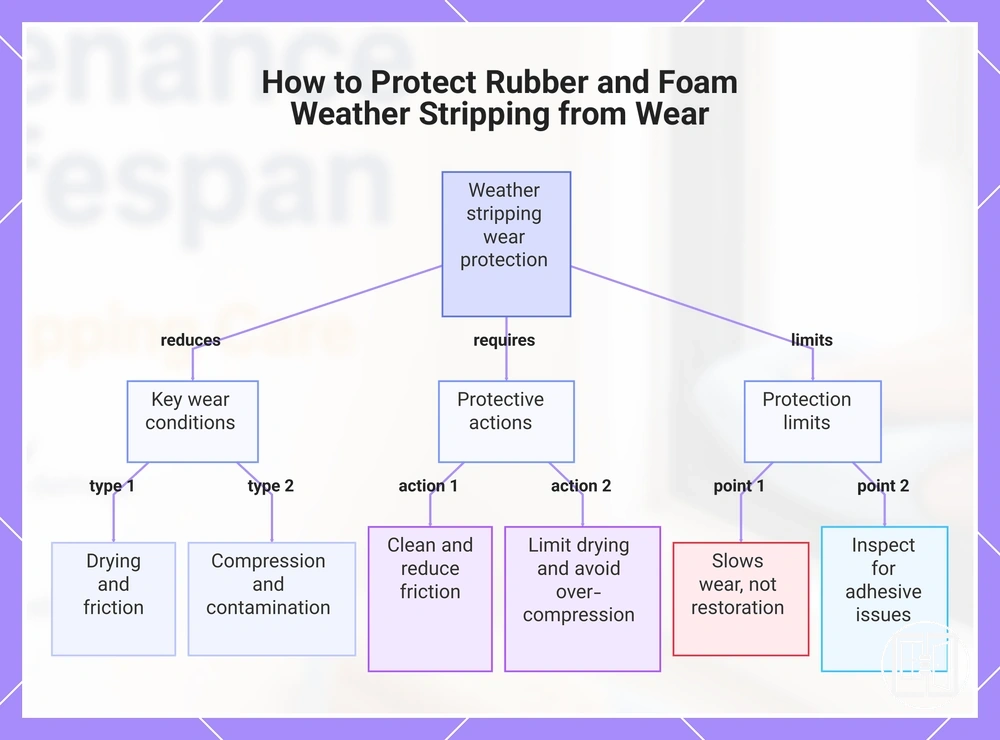
Protecting rubber and foam weather stripping from wear
Protecting rubber weather stripping and foam weather stripping means reducing the conditions that increase everyday wear. Limiting drying, friction, compression stress, and contamination can help preserve flexibility, compression recovery, and consistent seal contact over time, making protection a form of wear reduction rather than restoration.
Rubber weather stripping and foam weather stripping may respond differently to the same conditions. Rubber weather stripping may gradually lose flexibility as drying progresses, while foam weather stripping may be more affected by repeated compression stress that contributes to flattening and reduced seal contact. Both materials may also be affected by contamination that interferes with adhesion or sealing performance.
Protecting rubber and foam weather stripping from wear focuses on reducing the common conditions that contribute to material stress:
- Keep rubber weather stripping and foam weather stripping free from contamination and visible residue that may interfere with seal contact.
- Reduce unnecessary friction where frequently used doors or windows create repeated rubbing during normal operation.
- Help limit drying by maintaining a clean seal surface and using care that suits the material condition.
- Avoid unnecessary compression stress by checking that the seal is not continually over-compressed during normal use.
- Inspect flexibility and compression recovery regularly so early wear can be identified before sealing consistency changes.
Protection can slow normal wear, but it cannot restore a seal that has permanently flattened, cracked, or lost attachment. When adhesive or attachment problems are present, additional inspection may be needed to prevent seal failure.
This chart shows the key wear conditions to reduce, protective actions to take, and the limitations of protection for rubber and foam weather stripping.
Conditioning rubber seals without weakening the material
Conditioning rubber seals may help maintain flexibility when the seal is clean, the conditioner is compatible with the rubber material, and the application amount remains light. Surface response can vary between materials, so compatibility should be confirmed and the conditioner should be tested on a small test area before wider use.
Use the following precautions to keep conditioning focused on rubber seals while avoiding unnecessary residue or material-related problems:
- Compatibility: Choose a conditioner intended for the rubber seal material, because compatibility can influence surface response and long-term wear.
- Application amount: Apply only a light amount, as excess conditioner may leave residue that attracts contamination or changes the sealing surface.
- Test area: Test the conditioner on a small test area first, then check the surface response before applying it to the rest of the rubber seal.
- Residue: If residue remains after conditioning, remove the excess gently so the seal surface stays clean and consistent.
- Material distinction: Foam weather stripping and adhesive-backed strips may respond differently from rubber seals, so do not assume the same conditioning method is suitable for every material.
Reducing friction, pressure, and drying around active doors
Active doors can place weather stripping under repeated friction, pressure, and drying at the same contact points during normal opening and closing. Repeated movement, rubbing, or over-compression in these local areas may increase the wear rate, particularly where the seal experiences frequent contact. The checklist below helps verify contact stress rather than diagnose the entire door system.
Check the highest-use contact points to identify local stress conditions and determine whether maintenance is needed before wear becomes more pronounced.
- Friction: Look for rubbing marks or surface wear along the seal edge, because repeated friction at contact points may indicate a higher local wear rate.
- Pressure: Check for uneven pressure or over-compression that creates flattened areas, as these conditions may reduce compression recovery and signal a maintenance need.
- Drying: Inspect frequently used contact points for dry or brittle areas, since drying may reduce flexibility in high-use sections of the seal.
- Repeated movement: Observe whether repeated impact creates the same rubbing pattern each time the active door closes, as concentrated wear can indicate increased stress at that location.
- Maintenance cue: If wear is limited to specific contact points, monitor those local areas rather than assuming the entire door system requires repair.
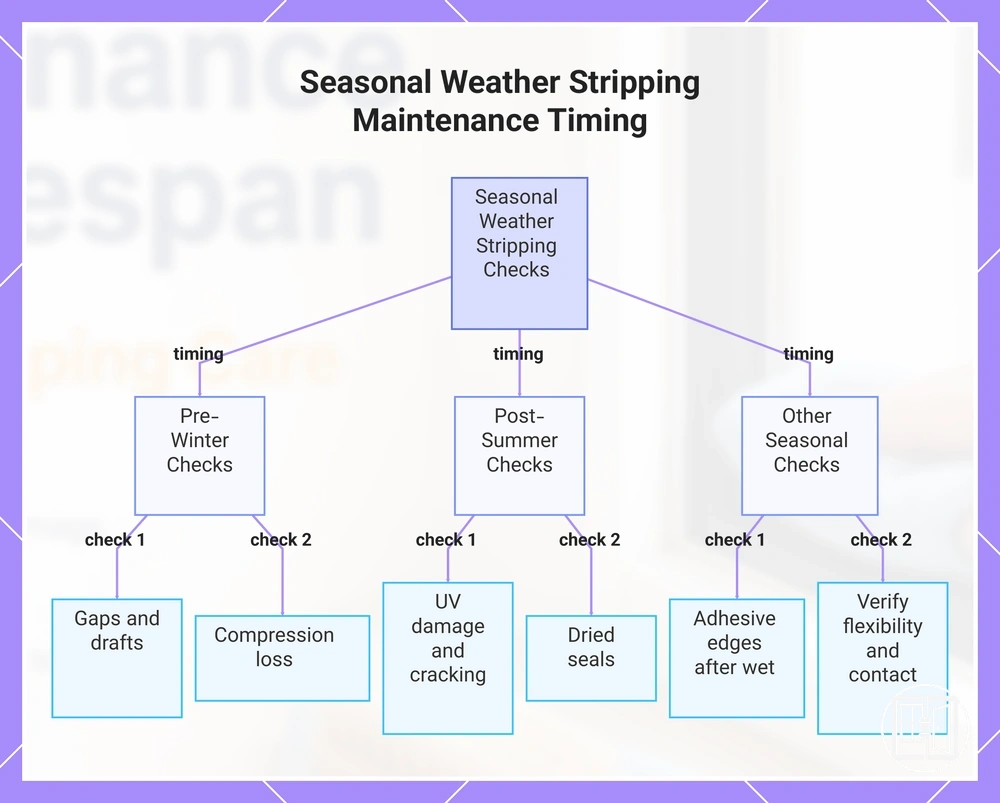
Seasonal maintenance timing for weather stripping
Seasonal maintenance for weather stripping should focus on inspections before periods of higher demand such as cold, wet, hot, or dry weather. Pre-winter and post-summer timing checks can help identify gaps, drafts, compression loss, UV damage, or dried seals before seasonal exposure increases stress on the seal. The most suitable timing depends on local weather conditions and the current seal condition.
Seasonal inspection priorities change with recent weather exposure rather than following one maintenance schedule for every climate. Pre-winter inspections should verify seal contact, gaps, drafts, and compression loss, while post-summer checks should look for UV damage, dried seals, or cracking after prolonged heat exposure. Local exposure, frame condition, and seal material may influence the maintenance action or monitoring needed.
Use this seasonal checklist to verify weather stripping condition before the next period of higher seasonal demand.
- Pre-winter: Check for gaps, drafts, and compression loss. If seal contact appears inconsistent, monitor the area or carry out appropriate maintenance before colder weather.
- Post-summer: Inspect for UV damage, dried seals, or visible cracking. If drying or surface changes are present, assess whether additional seal care is appropriate.
- After extended wet periods: Check adhesive edges and sealing surfaces for moisture-related changes. Continue monitoring if attachment or seal contact appears less consistent.
- After prolonged hot or dry conditions: Verify that the seal remains flexible and maintains consistent contact. Monitor areas showing drying or increased wear.
Condition-based monitoring is more reliable than relying on a fixed seasonal schedule. If repeated seasonal checks continue to show increasing gaps, compression loss, or dried seals, further maintenance or replacement assessment may be appropriate based on the observed condition.
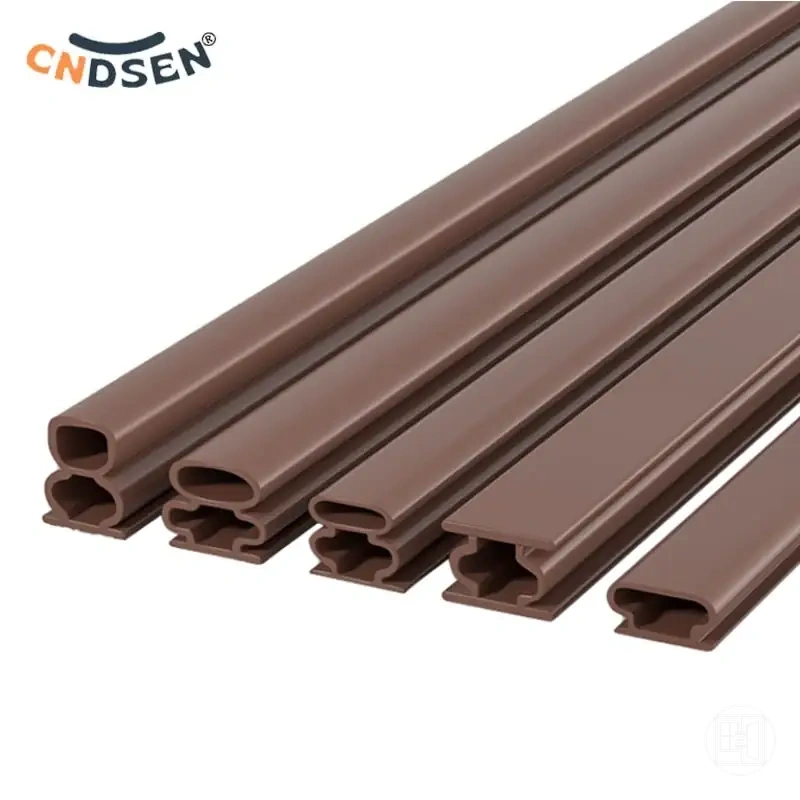
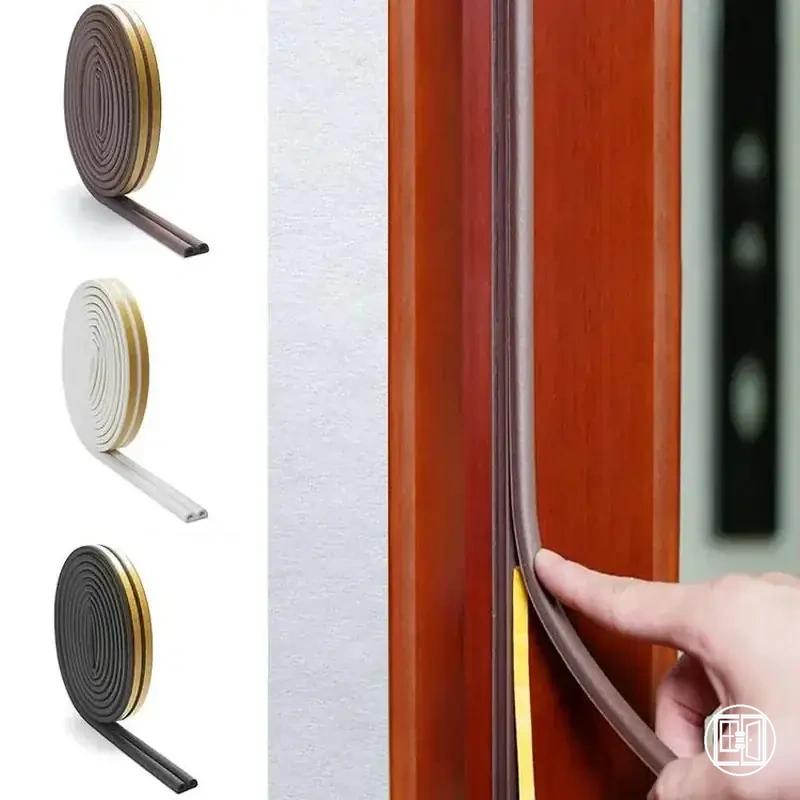
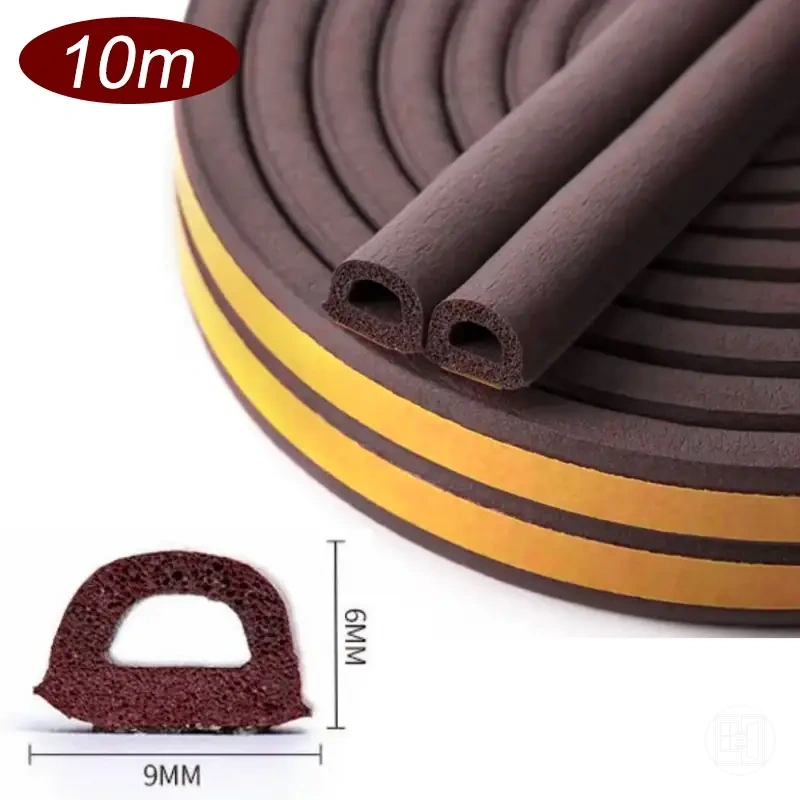
Here are product examples that may make comparison easier. Before buying, always review the compatibility criteria, essential features, and product details.
This chart shows when to inspect weather stripping, covering pre-winter, post-summer, and other seasonal checks based on weather exposure.
Pre-winter checks for gaps, drafts, and compression loss
Pre-winter checks should verify weather stripping before colder conditions increase sealing demand. Focus on gaps, drafts, compression loss, and consistent seal contact around the frame area so winter readiness is based on observable seal condition before cold weather arrives.
Use this checklist to verify pre-winter seal readiness before colder conditions increase demand on the weather stripping.
- Frame area: Check the full frame area for visible gaps. If gaps interrupt seal contact, they may increase draft risk and indicate a maintenance cue.
- Compression loss: Inspect the seal for flattened sections that do not recover after closing pressure is released. Reduced compression recovery may increase draft risk and suggest closer monitoring or replacement assessment.
- Exterior doors: Give exterior doors closer inspection where frequent use creates repeated seal contact. Uneven compression or rubbing marks may indicate higher local wear and a maintenance cue.
- Frequently opened windows: Check frequently opened windows for consistent seal contact and signs of drafts around active frame areas. If wear is concentrated in these locations, continued monitoring or maintenance may be appropriate.
Post-summer checks for UV damage and dried seals
After prolonged heat exposure, post-summer checks help identify UV damage and dried seals before reduced flexibility affects seal contact. Focus on visible changes to a sun-exposed seal rather than assuming all summer exposure causes damage, and use these post-summer wear signals to guide the next care decision.
Use this checklist to inspect weather stripping for common summer wear signals after heat exposure:
- Sun-exposed seal: Check for UV damage or surface drying. Light surface dryness can be monitored if flexibility and seal contact remain consistent.
- Hardening: Gently check whether the seal feels less flexible after heat exposure. Increased hardening may reduce seal contact and indicates a maintenance cue.
- Cracking: Inspect for visible cracking or brittleness. Unlike monitorable surface dryness, cracking that changes seal function may justify repair or replacement assessment.
- Adhesive stress: Look for edge lift or residue around adhesive-backed weather stripping. If adhesive stress affects attachment, monitor the area or carry out appropriate maintenance.
When maintenance is enough and when replacement is needed
Maintenance is enough when weather stripping remains attached, flexible, cleanable, and able to maintain frame contact. These conditions usually indicate that sealing function is still present and routine care may remain appropriate. Replacement is needed when wear changes sealing function rather than only the surface condition.
A maintainable condition typically includes weather stripping that stays securely attached, recovers after compression, and can be cleaned without losing consistent frame contact. Surface dirt, light residue, or minor cosmetic wear may justify maintenance, while the decision should depend on how the seal performs rather than appearance alone.
The table below separates maintainable conditions from replacement signals so the decision is based on seal condition rather than a fixed lifespan. Use the overall condition instead of relying on a single symptom.
| Condition | Maintenance may be enough when | Replacement becomes likely when | Decision note |
|---|---|---|---|
| Attachment | The seal remains attached along the frame. | Large sections no longer stay attached. | Attachment supports seal reliability. |
| Flexibility | The material stays flexible during normal use. | Hardening or brittleness changes sealing function. | Material response may affect sealing performance. |
| Compression | Compression recovers after closing pressure is released. | Compression loss leaves persistent flattening. | Reduced recovery may become a replacement signal. |
| Visible damage | Only light cosmetic wear is present. | Cracks or visible gaps change seal contact. | Judge damage by its effect on sealing function. |
| Drafts | Seal contact remains consistent after maintenance. | Drafts continue with visible sealing problems. | Evaluate the seal before assuming other causes. |
| Adhesive condition | The adhesive edge remains secure. | Adhesive failure prevents consistent attachment. | Confirm the cause before replacing the seal. |
replacement timing depends on whether wear has progressed from a maintainable condition to a replacement signal. Compression loss, persistent cracks, or visible gaps that reduce sealing function may indicate that replacement is more appropriate than continued maintenance.
Poor installation or adhesive failure should be considered before assuming normal lifespan wear, because attachment problems can reduce seal reliability without proving that the material has reached the end of its useful condition. Review how to prevent seal failure when attachment problems appear before making a replacement decision.
Here are product examples that may make comparison easier. Before buying, always review the compatibility criteria, essential features, and product details.